Anyway, today's DIY projects were done last week for our Fathers' Day and birthday celebration. Here are sneak peeks of the goodies I have in store for you today :-)
Click after the break for details on HOW TO plus more pics...
HOW TO MAKE YOUR OWN PAPER BUNTING
I didn't get to take any step by step pics, but it's that easy, you really don't need one!
Materials you need:
- assorted scrapbook paper
- ribbon (at least 2-3metres)
- cardboard (to make a template)
- scissors
- double sided tape or glue (I used double sided tape)
1) Make a template for your bunting. Decide on how big you want your 'flag' to be. Mine was approximately 1/4 of a 12x12 scrapbook paper.
2) Select which papers you want to use. For each bunting, I used 5 different designs.
3) Trace around your template as many times as you can.
4) Cut out each flag.
5) Prepare your ribbon on the floor, leaving a good length for tying onto windows, etc. I recommend measuring the area where you want the bunting to go, so you don't waste time or materials.
6) After selecting what order you want your flags to go, adhere onto ribbon with either double sided tape or glue. You can leave a small gap or a big gap in between each flag, or have no gaps at all. It's really up to you.
7) Hang up and party! :-)

HOW TO MAKE YOUR OWN HANGING FLORAL LANTERN
Now, this second DIY project is so pretty! Somewhat time consuming, but super easy to make.
Materials you need:
- paper lantern (you can buy them for $1-$4, depending on size, from variety stores)
- lei (again you can find these from variety stores for about $2)
- double sided tape or glue
- embroidery thread, or string, whatever you have
- opening up the paper lantern so it's in a ball shape.
- cut the thread of the lei to loosen the flowers.
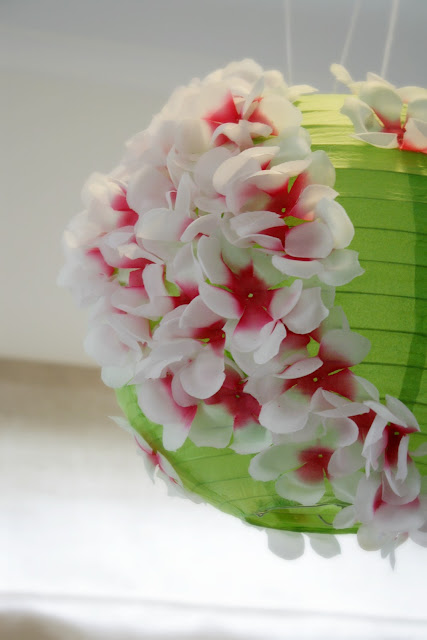
- adhere the flowers with double-sided tape or glue onto the lantern. You can fill the lantern with flowers, or do a graduating effect with scattered flowers like mine. If you do decide on filling the entire lantern with flowers, you may need 2-3 leis. :-)
- Hang on your ceiling, or anywhere you want it to go.
- ADMIRE and take lots of photos.
Then it should look a little something like this.
Ahhh, purty-ful!! hehe
Today I'll be decorating my home to prepare for the Rugby World Cup (RWC). I am superrr excited!! What teams are you guys cheering for?? I've been seeing a lot of flags on vehicles lately - of course, many All blacks supporters...but I have to say there seems to be a whole heap more Samoans and Tongans supporters out there. I love how everyone's getting into the RWC spirit! Tomorrow's opening should be awesome! Who are you cheering for?? NZ or Tonga? Either way, it is going to be a great opening match!!! I love what was written on a big black board in front of my son's school yesterday, it reads: SBW + MA'A = OUCH. That's right!!
Hope you enjoyed today's DIY post. Come back tomorrow for our Fathers' Day highlights. :-)
Have a great day!! xo


No comments:
Post a Comment